Quiz Layout Project Home << Quiz Layout
In this lesson we will create the skeleton HTML and CSS for our interactive quiz by looking at the action points raised in the last lesson and extracting the information required to do this.
Action List Revisited
The action points we will address in this lesson are highlighted in red.
- A container to hold the questions and multiple choice answers.
- A way to present the questions and possible answers to a question one at a time.
- A way to allow the user to select only one of multiple answers to a question.
- Visible markers for navigating the quiz questions.
- A way to navigate backwards and forwards through each question using the visible markers.
- A container to hold the progress bar.
- A way to update the progress bar as we work through the quiz.
- We have to store the user's answers somewhere for checking when the quiz is completed.
- A list of correct answers to check the user's answers against.
- A results container for user feedback.
- A summary of right and wrong answers to display within the results container when the quiz has completed.
- A score to show the user when the quiz has completed.
Quiz Layout Sketch
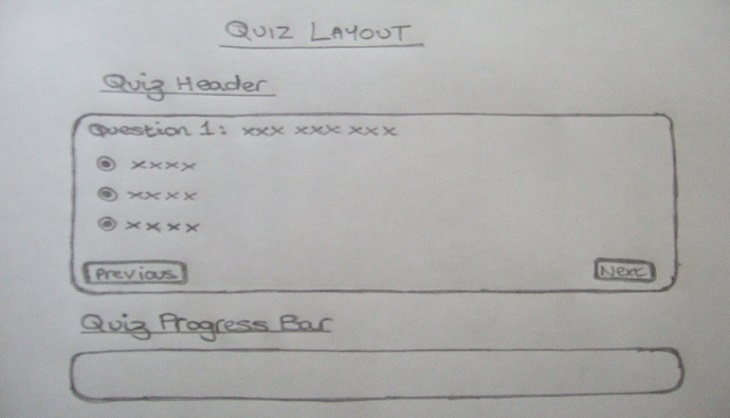
The first thing to do is draw a rough sketch of how we want the quiz to look, incorporating the information from action points 1, 4, and 6 above which all have to do with the presentation. As Arthur Brisbane once said 'A picture is worth a thousand words'.

Ok, now we have a visual representation of what our quiz is going to look like, we can start creating the HTML and CSS required by our sketch.
Deciphering Our Highlighted Action Points
Ok, let's go through our highlighted action points and sketch and see what we can glean from these for our layout.
1) A container to hold the questions and multiple choice answers.
We can use a <div></div> HTML element here to contain each question and the multiple choice answers.
4) Visible markers for navigating the quiz questions.
There are many elements we can use for this but to keep it simple we are going to place some links into a <div></div> HTML element.
6) A container to hold the progress bar.
We can use a <div></div> HTML element here to hold the progress bar.
Creating Our HTML
We can now create some HTML for our quiz based on our analysis of the action points for this lesson. We will wrap the quiz inside the page and a main content division as well.
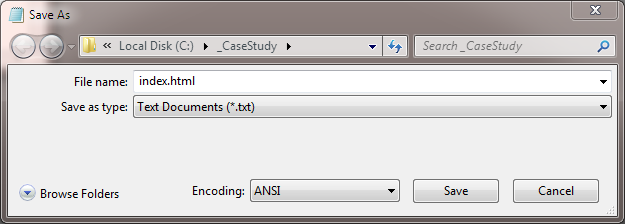
Using Notepad reopen the index.html file we created in Lesson 1: Interactive Quiz Proposal.
Copy and paste the following code into the reopened file inside the <body></body> HTML element.
  <div id="main">
    <h1>Interactive Quiz</h1>
    <div class="questionContainer">
      <div class="btnContainer">
        <div class="prev"></div>
        <div class="next"><a class="btnNext">Next ++</a></div>
        <div class="clear"></div>
      </div>
    </div>
    <div class="questionContainer">
      <div class="btnContainer">
        <div class="prev"><a class="btnPrev">-- Prev</a></div>
        <div class="next"><a class="btnNext">Next ++</a></div>
        <div class="clear"></div>
      </div>
    </div>
    <div class="questionContainer">
      <div class="btnContainer">
        <div class="prev"><a class="btnPrev">-- Prev</a></div>
        <div class="next"><a class="btnShowResult">Finish</a></div>
        <div class="clear"></div>
      </div>
    </div>
    <div class="txtStatusBar">Quiz Progress Bar
        <span class="errMsg hide"><strong>Please select an answer</strong></span></div>
    <div id="progressContainer" style="display: block;">
      <div id="progress"></div>
    </div>
  </div>
Save the file in the C:\_CaseStudy folder and close the Notepad.

Reviewing The HTML
We are just creating the skeleton HTML here which we will need to present with CSS.
Presenting Our Layout
We will present the HTML we have created so far with some CSS.
Ok, with Notepad or a simlilar text editor open, copy and paste the following CSS into the editor.
/* Reset browser styles */
h1, h2, p, div, ul, ol, li, code, pre, html, body {
  margin: 0;
  padding: 0;
  font-size: 100%;
  font-weight: normal;
}
.txtStatusBar {
  font-weight:bold;
  margin:5px 0px;
}
/* wrap main content */
.content {
  background-color: silver;
  border:1px solid black;
  float:left;
  margin: 10px;
  padding: 10px;
  position: relative;
  width: 730px;
}
/* Quiz heading */
h1 {
  font-size: 200%;
  font-weight:bold;
  text-align: center;
}
/* Question container */
.questionContainer {
  background:white;
  border:3px double black;
  margin:10px 0px;
  padding:3px;
  width:720px;
}
/* Button container */
.btnContainer {
  margin:10px 0 10px 1%;
  width:98%;
}
.prev{float:left;}
.prev a, .next a {
  background:none repeat scroll 0 0 white;
  border:1px solid #000000;
  cursor:pointer;
  font-size:10px;
  font-weight:bold;
  padding:2px 5px;
}
.prev a:hover, .next a:hover {
  background:none repeat scroll 0 0 #36648B;
  color:white !important;
  text-decoration:none !important;
}
.next, .btnShowResult {float:right;}
.clear {clear:both;}
/* Progress bar */
.txtStatusBar {
  font-weight:bold;
  margin:5px 0px;
}
#progressContainer {
  background:white;
  border:3px double black;
  height:25px;
  margin:0px;
  padding:3px;
  width:720px;
}
#progress {
  background:none repeat scroll 0 0 #36648B;
  height:25px;
  width:0;
}
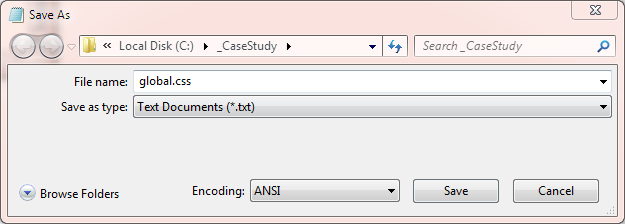
Click file from the toolbar and then click the save option.
In the Save in: tab at the top make sure you are pointing to the _CaseStudy folder we created above.
In the File name: text area type global.css and then click the Save button and close the Notepad.

The .css file extension lets the system know that this is a cascading stylesheet document, you must save the file with this extension so your default web browser knows what the file is for.
Reviewing The CSS
The first thing we do is reset browser styles for our tags; then we create styles for the main content and divisions we created with the HTML.
Viewing The Quiz
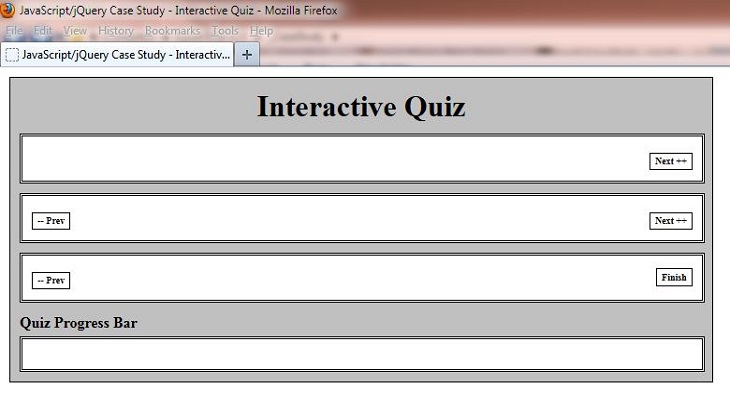
From the C:\_CaseStudy folder, double click on the index.html saved file and it will appear in your default web browser and look something like the following image. As you
can see from the screenshot all the quesion containers are displayed along with a progress bar.

Lesson 2 Complete
In this lesson we have reviewed some of the action points raised in the last lesson. We used this information to make a sketch and from this create our basic page layout.
Related Articles
HTML Doctor - HTML Intermediate Tutorials - Lesson 2 - More HTML Structure
HTML Doctor - CSS Basic Tutorials - Lesson 8 - Padding & Margins
HTML Doctor - CSS Basic Tutorials - Lesson 9 - Borders
HTML Doctor - CSS Intermediate Tutorials - Lesson 1 - Backgrounds
HTML Doctor - CSS Intermediate Tutorials - Lesson 2 - A Final Look At The Box Model
HTML Doctor - CSS Intermediate Tutorials - Lesson 7 - Positioning
HTML Doctor - CSS Advanced Tutorials - Lesson 6 - Layout
